How to make a paper plane.
Make the main center fold
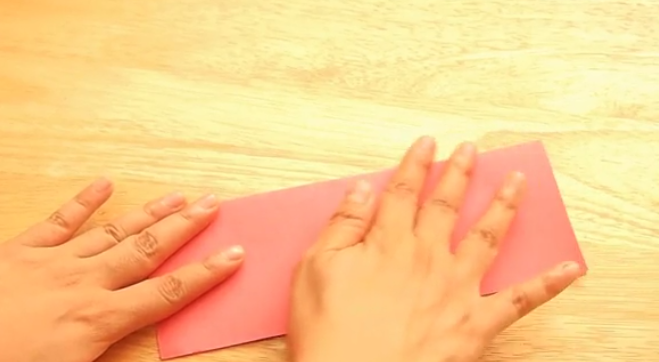
Step 1) Fold the piece of paper in half. This should bring the two longer sides together.
|  |
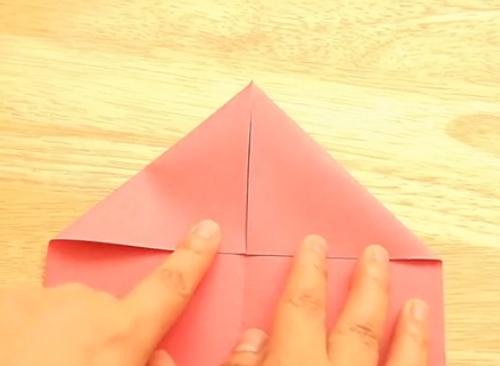
Fold the top corners to meet at the center.
Step 2) Open up the paper again and then fold the two top outer corners inwards so that they meet along the middle crease.
|  |
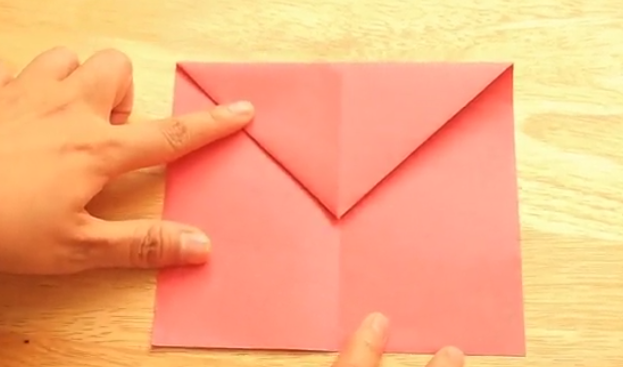
Fold down the point.
Step 3) Fold the point made in the previous step down to the crease so that the flaps are tucked under this fold. Now the paper should likely look like the back of an envelope.
|  |
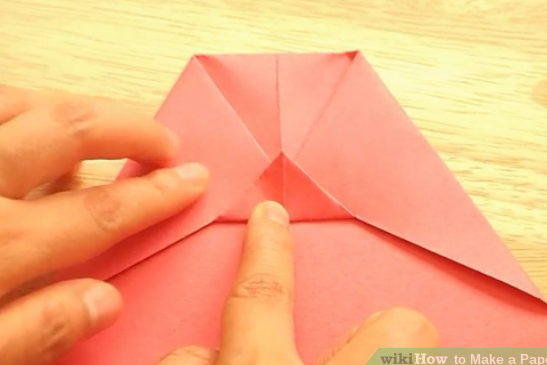
Fold the New Corners
Step 4) Fold the two top corners created in the last step down to the center line, so that the points are about 2/3 of the way down the center crease of the flap.
|  |
Fold up the point
Step 5) Fold up the point that has been covered in the last step so that it the two points stay in place.
|  |
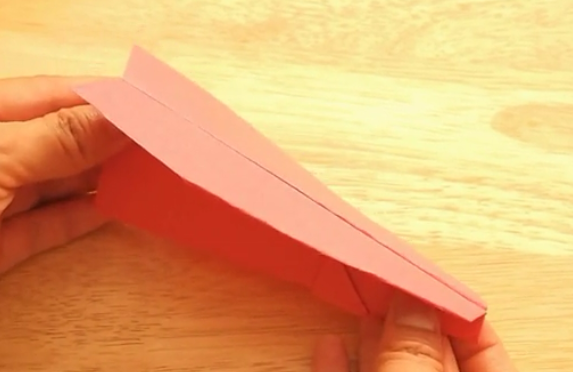
Fold the paper in half along the original center fold
Step 6) All the folds made in the last steps should be facing down. Now fold it in half.
|  |
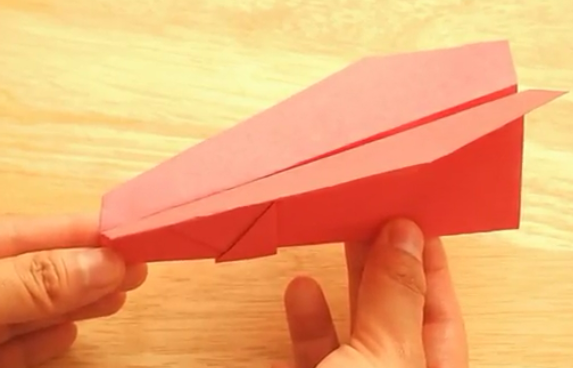
Create the wings.
Step 7) Fold both side flaps down to the bottom so that the long edge of the wings are perfectly in line with the bottom of the airplane.
|  |
Angle the wings.
Step 8) Unfold the wings slightly so that they are sticking out.
|  |
Test your paper plane
Step 9) Put your thumb and fingers in front of the plane, under the two flaps. Then gently throw your plane to see how far it goes.
|  |
No comments:
Post a Comment